In the fiercely competitive real estate market, listing photography is no longer a mere formality; it's a critical sales tool. Potential buyers form their first impression of a property within seconds of viewing its photos online. High-quality, compelling images can significantly increase clicks, showings, and ultimately, offers. Conversely, poor photography can cause an otherwise perfect home to be overlooked entirely, costing you and your clients valuable time and money. Capturing images that truly sell a property requires a blend of technical knowledge, artistic composition, and strategic marketing-a skill set that directly translates to faster sales and higher closing prices.
This guide is designed to provide real estate agents, marketers, and brokers with a definitive collection of actionable real estate photography tips. We will move beyond generic advice and delve into the specific techniques that professionals use to make properties shine. You will learn how to master everything from essential pre-shoot staging and optimal camera settings to advanced composition strategies and post-processing workflows. We'll cover room-by-room guidance, the effective use of lighting, and how to leverage modern tools like drones, 3D tours, and AI-powered virtual staging to create a powerful visual narrative for your listings.
By implementing these proven strategies, you will gain the confidence and skills to produce stunning visuals that not only capture attention but also create an emotional connection with prospective buyers. This comprehensive resource will equip you to elevate your marketing, attract more qualified leads, and transform your listings from just another property on the market into a must-see home.
1. Use a Wide-Angle Lens
A wide-angle lens is arguably the most crucial piece of equipment in a real estate photographer's toolkit. These lenses, typically in the 10-24mm or 16-35mm focal range, are designed to capture a broader field of view than the human eye. This capability is essential for interior shots, as it allows you to showcase the full scope of a room, including its layout and spatial dimensions, in a single, compelling image.
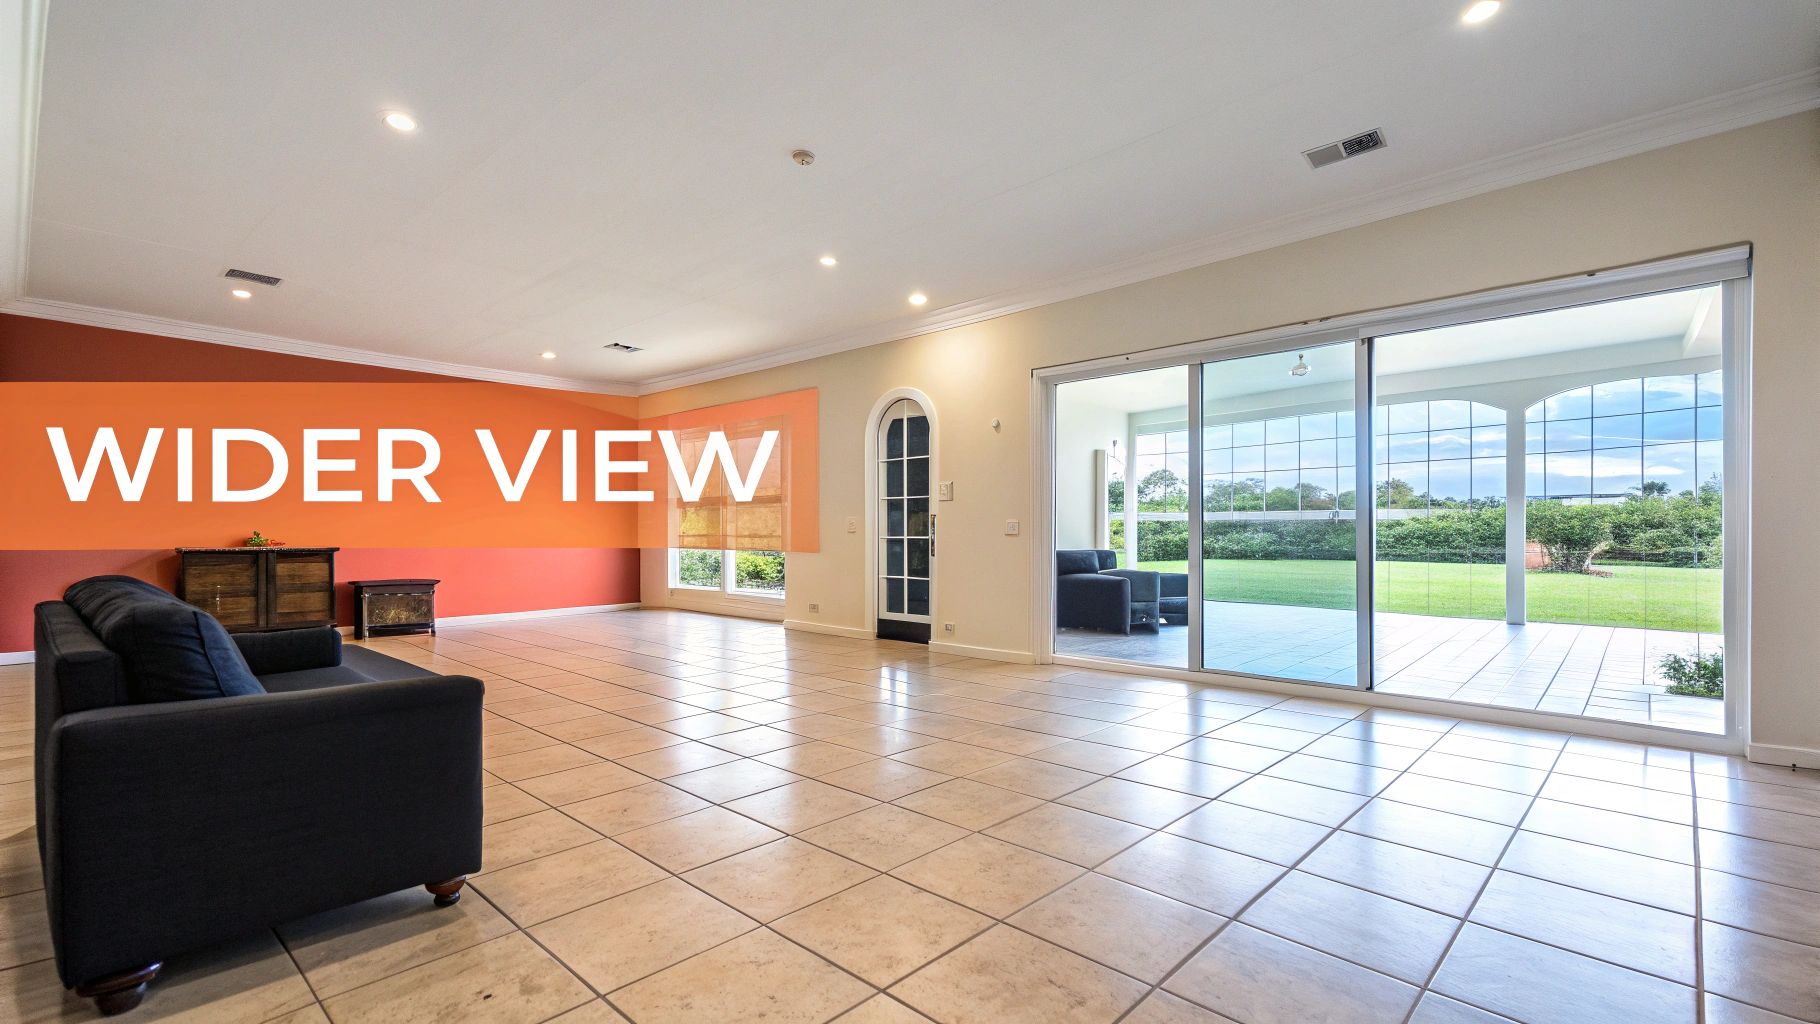
The primary benefit is psychological; wide-angle shots make spaces feel larger, more open, and more inviting. When potential buyers browse listings on platforms like Zillow or Redfin, photos taken with a wide lens immediately convey a sense of spaciousness that standard lenses cannot replicate. This technique helps buyers visualize themselves in the home and better understand the property's flow from one room to the next.
How to Implement This Tip Effectively
To master one of the most fundamental real estate photography tips, focus on precision and control. Using a wide-angle lens isn't just about fitting everything in; it's about creating a balanced and realistic representation of the space.
- Choose the Right Focal Length: For most residential interiors, a focal length between 16mm and 24mm is the sweet spot. Anything wider (like 10-12mm) can introduce excessive distortion, making rooms look unnaturally stretched and unrealistic.
- Maintain Straight Vertical Lines: A common mistake is tilting the camera up or down, which causes vertical lines like walls and doorways to converge and appear crooked. To avoid this, keep your camera perfectly level. Using a tripod with a built-in bubble level is non-negotiable for professional results.
- Set the Correct Camera Height: Position your camera at eye level, generally around 5 to 6 feet from the floor. This height creates a natural perspective that mimics how a person would view the room, making the image feel more grounded and relatable.
- Watch for Distortion: While modern lenses and software can correct for some distortion, always be mindful of objects near the edges of your frame. Placing furniture or decor too close to the edge can cause it to look warped or stretched. Frame your shot carefully to minimize this effect.
2. Master Proper Lighting Techniques
Strategic lighting is the element that separates an amateur snapshot from a professional photograph. It's crucial in real estate photography to highlight architectural features, create a warm and inviting ambiance, and ensure rooms appear bright and spacious. The goal is to blend natural and artificial light to produce a balanced, flattering image that accurately represents the home while making it look its absolute best.
The impact of good lighting is significant; MLS listings with bright, professionally lit interiors can receive up to 40% more inquiries. By controlling light, you guide the buyer's eye and evoke positive emotions, making them feel like the property is a place they want to call home. This technique ensures every corner of the property is visible and appealing, leaving no dark, mysterious shadows that could create doubt or disinterest.
How to Implement This Tip Effectively
Mastering lighting is one of the most transformative real estate photography tips you can learn. It involves more than just flipping a switch; it's about layering different light sources to create depth and clarity.
- Turn On All Interior Lights: Before you begin shooting, turn on every lamp, overhead light, and sconce. This adds warmth and dimension, showcasing the home’s built-in lighting design and creating a cozy, lived-in feel.
- Use a Fill Flash or Speedlight: Natural light from windows often creates harsh shadows in the corners of a room. Use an off-camera flash (a speedlight) bounced off a ceiling or wall to "fill" these dark areas, resulting in a more evenly lit and professional-looking photograph.
- Time Your Exterior Shots: For exterior photos, the "golden hour" (the hour just after sunrise or before sunset) provides soft, warm, and flattering light that makes properties glow. Avoid shooting in harsh midday sun, which creates deep shadows and blown-out highlights.
- Shoot in RAW Format: Always set your camera to shoot in RAW instead of JPEG. RAW files capture significantly more light data, giving you far greater flexibility to adjust exposure, shadows, and highlights during post-processing without losing image quality.
3. Eliminate Clutter and Stage Properly
Beyond camera settings and lenses, the single most impactful factor in great real estate photography is the state of the room itself. Proper staging involves strategically decluttering and arranging furniture to create a clean, inviting, and neutral space. A well-staged home allows potential buyers to envision their own lives within the walls, rather than being distracted by the current owner's personal belongings.
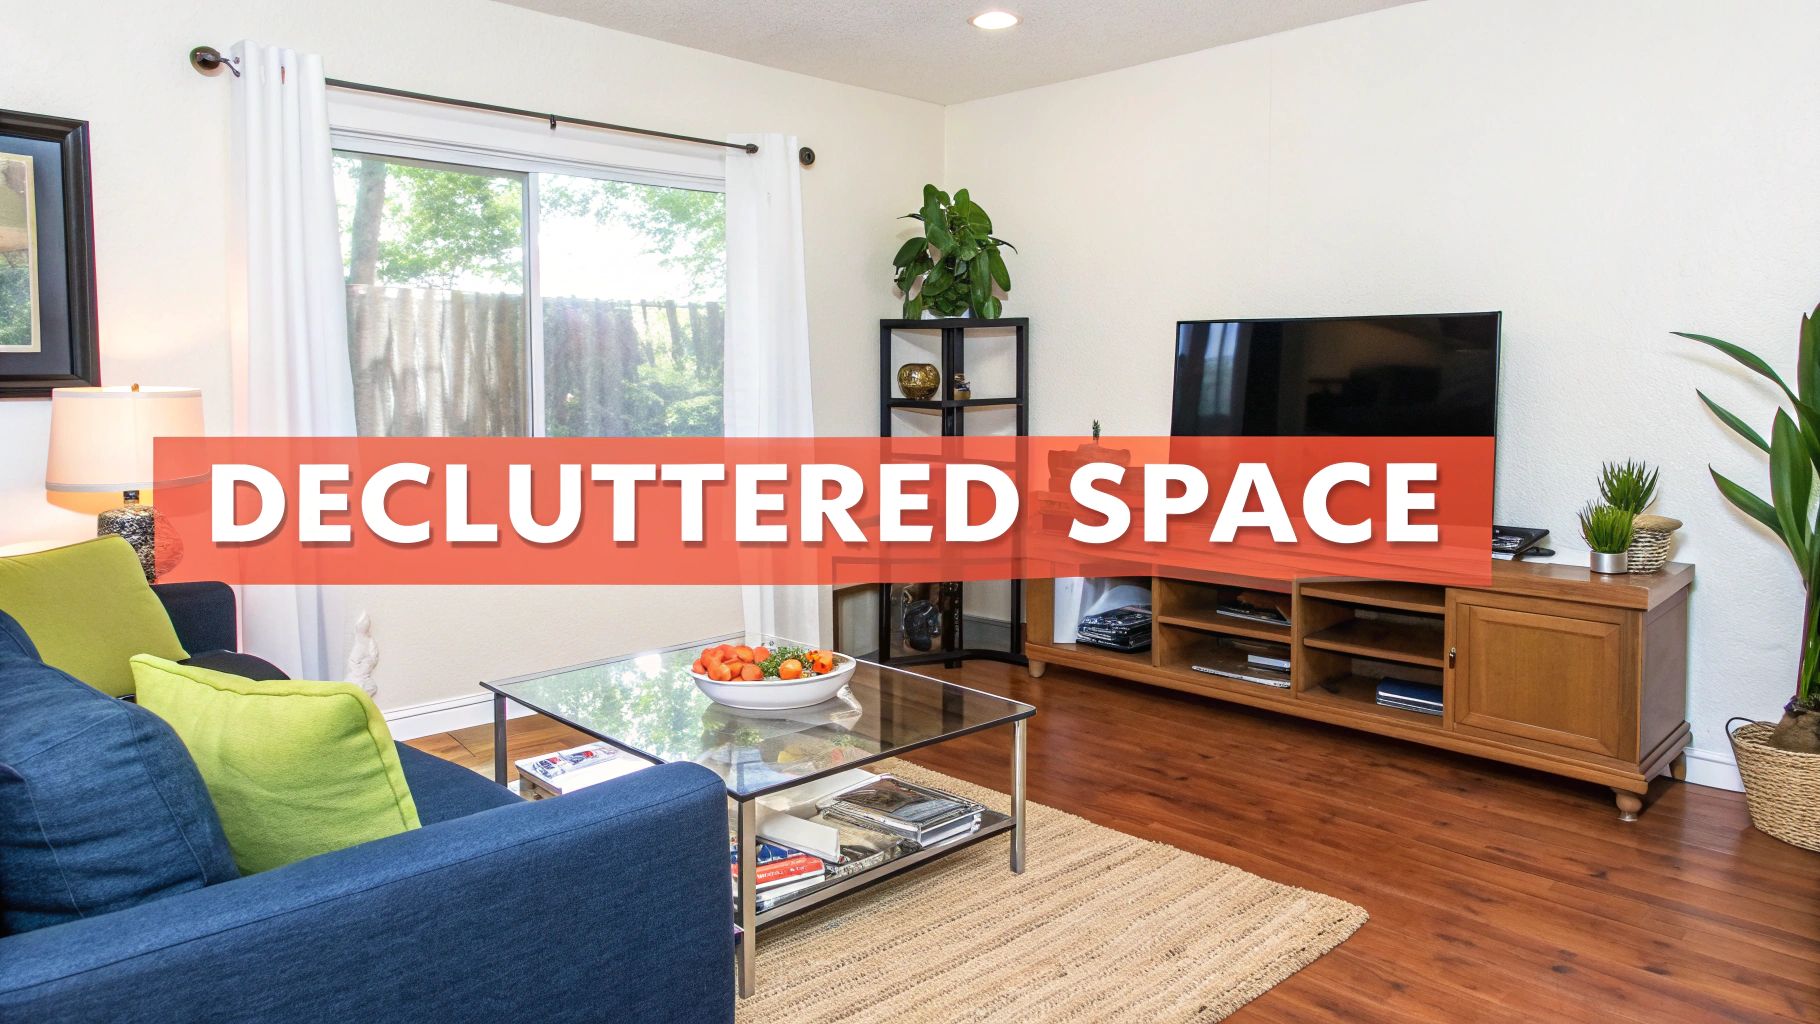
The data backs this up: according to the National Association of Realtors (NAR), staged properties sell significantly faster. When a space is clean, organized, and free of clutter, it not only photographs better but also feels larger and more valuable. This preparation transforms a personal home into a desirable product, making it one of the most essential real estate photography tips for securing a quick and profitable sale.
How to Implement This Tip Effectively
Staging isn't about making a home look like a museum; it's about maximizing its appeal to the broadest audience possible. This requires a methodical approach to cleaning, organizing, and depersonalizing.
- Depersonalize and Declutter: The first step is to remove personal items like family photos, refrigerator magnets, and excessive knick-knacks. Aim to remove 30-50% of the existing furniture and decor to create a more open, spacious feel.
- Embrace Neutrality: Use neutral colors like whites, grays, and beiges for bedding, towels, and throw pillows. A neutral palette is less distracting and allows potential buyers to easily imagine their own furniture and style in the home.
- Clear All Surfaces: Countertops in kitchens and bathrooms should be almost entirely clear. Leave only a few tasteful, intentional items, like a small plant or a bowl of fruit. This highlights the available counter space.
- Deep Clean Everything: Ensure the entire property is spotlessly clean. Dust, smudges on windows, and dirty floors are amplified in high-resolution photos. A clean home signals to buyers that the property has been well-maintained.
- Consider Virtual Staging: For vacant properties or rooms that are difficult to stage physically, technology offers a powerful solution. You can learn more about how AI can enhance your listings with virtual staging on bounti.ai, which digitally adds furniture and decor to empty rooms.
4. Use Vertical and Horizontal Lines Effectively
Strong composition is the backbone of professional photography, and in real estate, this often means mastering the use of vertical and horizontal lines. These lines, found in doorways, walls, windows, and flooring, provide a sense of structure, balance, and stability. When used effectively, they guide the viewer's eye through the image, create depth, and convey a feeling of architectural integrity and order.
Aligning your shots with the property's architectural elements produces clean, professional-looking photos that stand out in a crowded market. Crooked or converging lines can make a space feel unsettling and amateurish. In contrast, perfectly straight verticals and level horizontals signal quality and attention to detail, subtly enhancing a potential buyer's perception of the home itself.
How to Implement This Tip Effectively
Mastering this fundamental composition technique is one of the most impactful real estate photography tips for elevating your images from simple snapshots to professional marketing assets. It's about creating a deliberate, visually pleasing structure within your frame.
- Keep Vertical Lines Perfectly Vertical: The most common mistake is tilting the camera, which causes walls and doorways to look like they are falling backward. To prevent this, your camera must be perfectly level. Use a tripod with a built-in bubble level or your camera’s digital level display to ensure every shot is straight.
- Align Horizontals with the Frame: Keep horizontal lines like countertops, window sills, and tabletops parallel to the top and bottom of your frame. This creates a sense of stability and calm.
- Shoot Perpendicular to Walls: For clean, straight-on shots, position your camera so the sensor is parallel to the main wall you are featuring. This minimizes distortion and emphasizes the room's clean geometry.
- Correct in Post-Processing: Even with careful setup, minor distortions can occur. Use software like Adobe Lightroom or Photoshop to make final adjustments. The "Transform" or "Lens Corrections" panels can quickly and easily straighten any converging lines you missed on-site.
5. Capture Exterior and Curb Appeal Photos
The exterior shot is the digital handshake of a property listing; it’s the very first image a potential buyer sees and the one that determines if they click for more. High-quality exterior photos that highlight strong curb appeal are non-negotiable, as they establish the property's character, condition, and overall desirability before a viewer ever sees the interior. This first impression sets the tone for the entire listing.
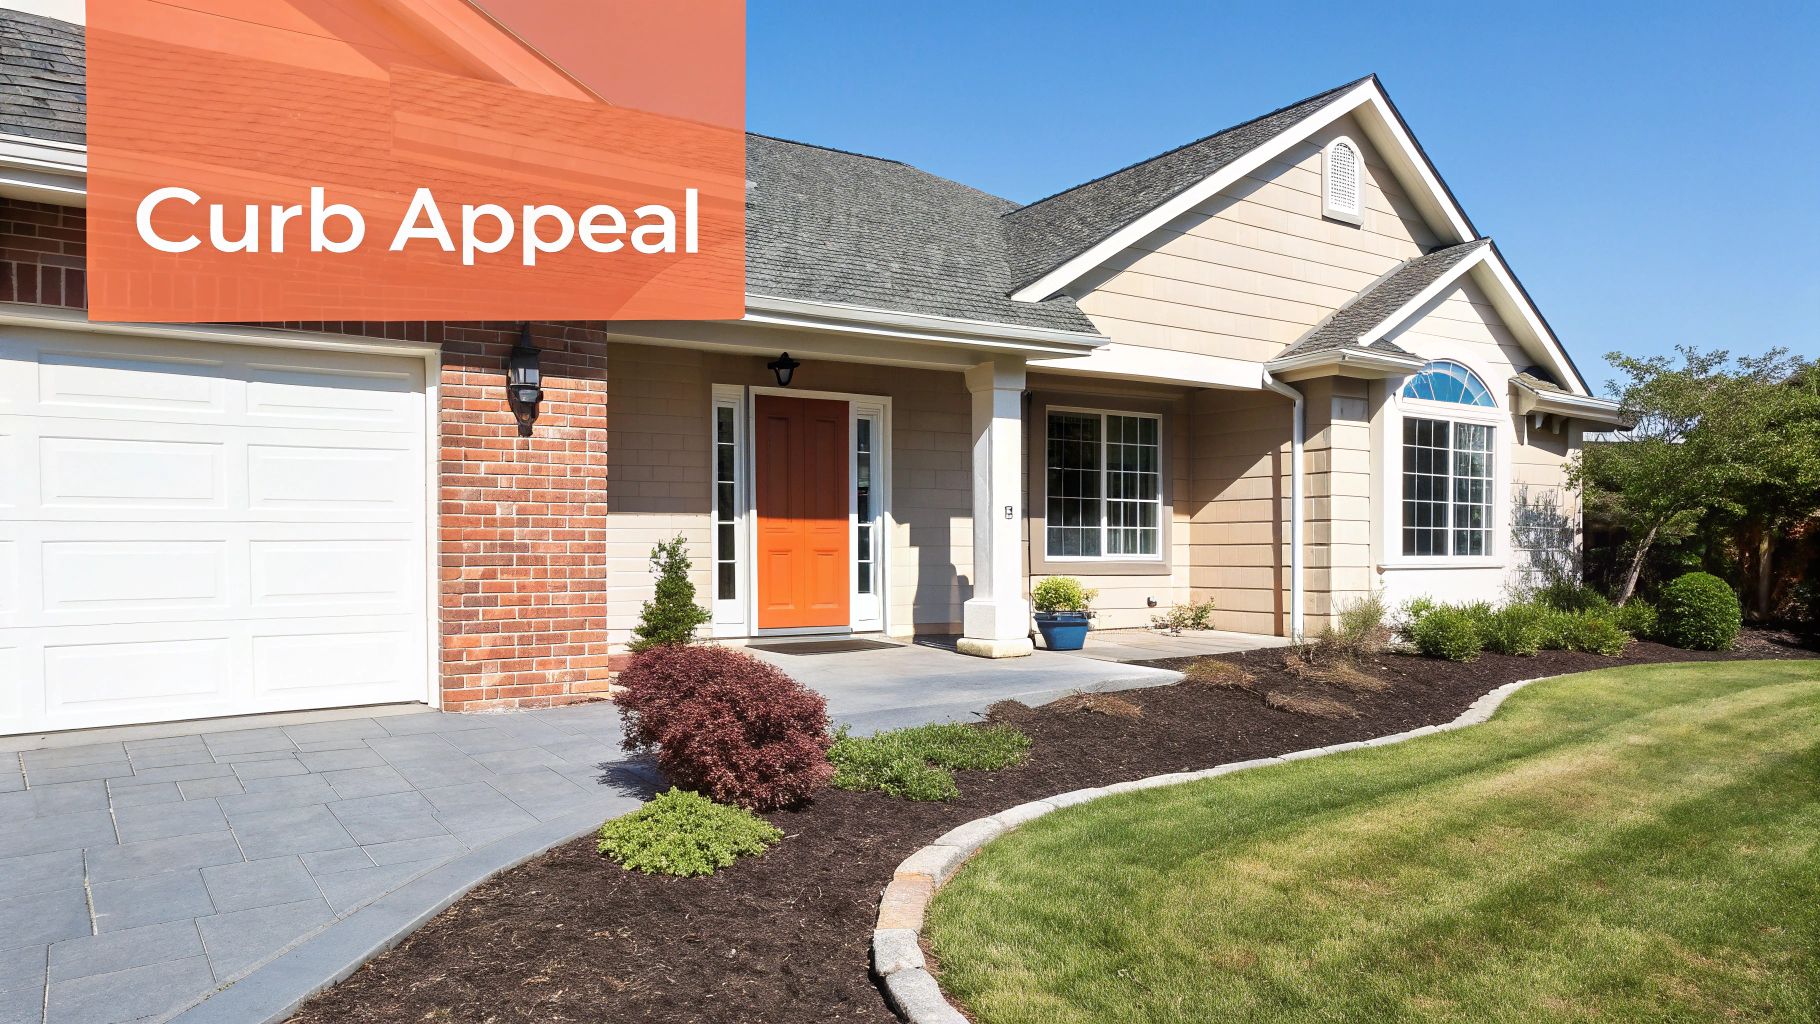
A compelling curb appeal photo does more than just show the house; it sells a lifestyle and conveys a sense of pride in ownership. Listings with exceptional exterior photography often stand out on crowded platforms, capturing more attention and, according to the National Association of Realtors (NAR), can lead to significantly more inquiries. This initial visual hook is crucial for driving traffic and generating serious interest.
How to Implement This Tip Effectively
Creating magazine-worthy exterior shots involves both preparation and technique. Applying these real estate photography tips for exteriors will ensure your listings make an unforgettable first impression.
- Time Your Shoot for the Golden Hour: Schedule your exterior shoot for the "golden hour," the period shortly after sunrise or before sunset. This time provides soft, warm, and directional light that accentuates architectural details and makes the property glow without harsh shadows.
- Prepare the Property Thoroughly: The best lighting can't hide a lack of preparation. Ensure the lawn is freshly mowed, landscaping is edged, and driveways and walkways have been power washed. Hide garbage cans, remove vehicles from the driveway, and make sure house numbers are clean and visible.
- Photograph from Multiple Angles: Don't just take one straight-on shot. Capture the home from various angles to showcase its best features, including the entryway, unique architectural elements, and side yards. A slightly angled shot often adds more depth and dimension than a flat, head-on perspective.
- Focus on Welcoming Details: Capture a well-lit shot of the front entrance. A clean, freshly painted front door, attractive potted plants, and pristine welcome mat create a powerful sense of invitation that resonates with buyers.
6. Employ HDR Photography and Processing
High Dynamic Range (HDR) photography is a game-changing technique for conquering one of real estate's biggest lighting challenges: balancing bright windows with darker interiors. Instead of taking one picture, HDR involves capturing multiple exposures of the same scene at different brightness levels (typically one dark, one balanced, and one bright) and merging them into a single, perfectly exposed image. This method ensures that every detail, from the sunlit view outside the window to the subtle textures in the shadowy corners of the room, is rendered with clarity and richness.
The primary benefit of HDR is its ability to produce a final image that more closely resembles what the human eye sees. Standard cameras struggle to capture this wide range of light, often resulting in "blown-out" (overly bright) windows or dark, uninviting interiors. Listings featuring well-executed HDR photos see significantly higher engagement because they appear professional, vibrant, and true-to-life, allowing potential buyers to appreciate both the interior space and its exterior views simultaneously.
How to Implement This Tip Effectively
To master this crucial technique, you must focus on both the in-camera capture and the post-processing merge. When done correctly, HDR is one of the most powerful real estate photography tips for creating magazine-quality images.
- Use a Tripod and Bracket Mode: Stability is paramount. Mount your camera on a sturdy tripod to ensure each exposure is perfectly aligned. Use your camera's auto-exposure bracketing (AEB) feature to automatically capture a series of shots, typically at -2, 0, and +2 exposure values.
- Merge in Specialized Software: Use software like Adobe Lightroom or Photoshop to merge the bracketed photos. These programs offer HDR merging tools that align the images and give you control over the final look.
- Aim for a Natural Look: The goal is realism, not an over-processed, "glowing" effect. After merging, adjust settings like highlights, shadows, and whites to create a balanced, natural-looking image. Avoid pushing the saturation or clarity sliders too far.
- Leverage AI-Powered Tools: Modern editing suites can simplify this process immensely. For instance, AI-enhanced platforms can automate HDR blending and other complex edits, saving significant time. Learn more about how modern tools are streamlining photo editing.
7. Incorporate Kitchen and Bathroom Showcase Photography
Kitchens and bathrooms are often the most scrutinized rooms in a property, serving as major selling points that can significantly influence a buyer's decision. Showcase photography focuses on capturing these high-value spaces with magazine-quality detail, highlighting their unique features, modern finishes, and overall functionality to create a powerful emotional appeal. Studies consistently show that listings with high-quality kitchen and bathroom photos receive higher engagement and can even attract better offers.
The goal is to go beyond simple documentation and create an aspirational vision. A well-photographed kitchen isn't just a place to cook; it's the heart of the home. A pristine bathroom becomes a personal spa-like retreat. By focusing on the details that add value, such as granite countertops, designer faucets, or custom tile work, you help potential buyers see the quality and investment made in the property, justifying its asking price and setting it apart from the competition.
How to Implement This Tip Effectively
Mastering kitchen and bathroom photography is one of the most impactful real estate photography tips for elevating a listing. It requires a meticulous approach that blends wide-angle views with detailed close-ups.
- Declutter and Deep Clean: Remove all personal items, magnets, and countertop clutter. Surfaces should be completely clear, except for one or two simple, elegant staging items like a vase of flowers or a bowl of fresh fruit. Ensure all appliances, mirrors, and fixtures are spotlessly clean and free of fingerprints.
- Shoot Both Wide and Detail Shots: Start with a wide shot from a corner to capture the room's layout and flow. Then, move in to create detailed shots of high-end features like a rainfall showerhead, a farmhouse sink, or under-cabinet lighting. These close-ups emphasize quality and luxury.
- Control Lighting and Reflections: Kitchens and bathrooms are full of reflective surfaces. Use soft, diffused light to minimize harsh glares and dark shadows. Turn on all ambient lights but be prepared to bracket your exposures (HDR) to balance the bright lights with the rest of the room.
- Perfect Your Angles: For bathrooms, a wide-angle lens (around 16-20mm) can make the space feel larger, but be careful to keep vertical lines straight. In both rooms, shoot from multiple angles to provide a comprehensive view. Position the camera at chest height to create a natural and inviting perspective.
8. Master Virtual Tours and 3D Photography Technology
Virtual tours and 3D photography have moved from being a luxury add-on to a core component of modern real estate marketing. This technology uses specialized cameras to capture a space from multiple angles, stitching the images together to create an immersive, interactive model. Potential buyers can "walk" through the property remotely, giving them a detailed and engaging experience that static photos cannot match.
The primary advantage is unparalleled access and engagement. Zillow reports that listings featuring a 3D home tour receive significantly more inquiries and are saved more often by buyers. This technology allows out-of-town buyers to explore a home in depth and helps local buyers narrow their choices before scheduling an in-person visit, ultimately leading to more qualified leads and faster sales.
How to Implement This Tip Effectively
To create a professional and effective virtual tour, meticulous planning and execution are key. This is one of the most powerful real estate photography tips for setting your listings apart in a crowded market.
- Choose the Right Platform: Services like Matterport are the industry standard for high-end, immersive 3D tours that include a "dollhouse" view and floor plan generation. For a more accessible option, Zillow 3D Home allows you to create tours using a 360-degree camera or even a compatible smartphone.
- Prepare the Property Meticulously: 3D cameras capture everything. Ensure the home is immaculately clean, decluttered, and staged. Pay extra attention to mirrors and reflective surfaces, as the camera and tripod can easily appear in them.
- Plan Your Scan Path: Create a logical and smooth navigation flow through the property, just as you would for an in-person showing. Scan every room, hallway, and major closet to provide a complete picture. Maintain clear sight lines and avoid dead ends.
- Ensure Consistent Lighting: Proper lighting is even more critical for 3D captures than for standard photos. Open all blinds and turn on all lights to create bright, consistent illumination throughout the home, minimizing dark areas and improving the overall quality of the scan.
9. Optimize Camera Settings and Shoot in RAW Format
Mastering your camera settings and shooting in RAW format is a non-negotiable step for producing professional-grade real estate images. Unlike JPEGs, which are compressed and processed in-camera, RAW files capture all the uncompressed image data directly from the camera's sensor. This process preserves the maximum amount of detail, dynamic range, and color information.
The primary advantage is unparalleled flexibility in post-processing. With RAW files, you can correct exposure, adjust white balance, recover blown-out highlights in windows, and pull detail from dark shadows without degrading image quality. For agents and marketers aiming for the bright, clean, and polished look seen in premium listings, shooting in RAW is the only way to achieve consistent, high-end results that make a property shine online.
How to Implement This Tip Effectively
Applying the right camera settings is one of the most impactful real estate photography tips for elevating your work from amateur to professional. It ensures you capture the best possible source file to work with later.
- Shoot Exclusively in RAW: Navigate to your camera’s menu and change the image quality setting from JPEG to RAW. This single change gives you complete control during the editing phase.
- Use Aperture Priority Mode (A/Av): This semi-automatic mode allows you to set the aperture while the camera automatically selects a corresponding shutter speed for correct exposure. For real estate, an aperture of f/8 to f/11 is ideal for ensuring everything from the foreground to the background is in sharp focus.
- Keep ISO Low: Set your ISO to the lowest native setting, typically ISO 100 or 200. This minimizes digital noise and grain, resulting in cleaner, crisper images. Since you'll be using a tripod, a slower shutter speed won't be an issue.
- Bracket Your Exposures: To handle rooms with bright windows and dark interiors, use your camera’s auto-exposure bracketing (AEB) feature. Taking three to five shots at different exposures allows you to blend them into a single, perfectly lit High Dynamic Range (HDR) image in post-production.
- Set a Custom White Balance: Instead of relying on auto white balance, which can be inconsistent, set it manually. Place a gray card in the room, take a reference photo, and use it to set a custom white balance for perfectly accurate colors.
10. Create Compelling Photo Descriptions and Metadata
While stunning visuals are paramount, the text accompanying your photos plays a critical role in their success. Compelling descriptions and optimized metadata are non-visual elements that significantly enhance a listing's searchability, provide crucial context, and improve buyer engagement. Neglecting this step means your beautiful photos may never reach their full audience potential.
Effective descriptions transform a photo from a simple image into a narrative, guiding potential buyers through the home's story. Well-structured metadata, including keywords, alt-text, and location tags, acts as a digital signpost, helping search engines and property portals like Zillow understand and rank your listing. This process ensures your property appears in relevant searches, driving more qualified traffic.
How to Implement This Tip Effectively
Mastering this aspect of real estate photography tips bridges the gap between great images and effective marketing. It's about making your photos work harder for you behind the scenes.
- Write Lifestyle-Oriented Captions: Instead of "Living Room," write "Sun-drenched living room with vaulted ceilings, perfect for morning coffee and entertaining guests." This paints a picture and helps buyers visualize themselves in the space.
- Optimize File Names: Before uploading, rename your image files from "IMG_1234.jpg" to something descriptive like "123-elm-street-downtown-kitchen-granite-countertops.jpg." This is a simple but powerful SEO practice.
- Complete All Metadata Fields: When uploading to the MLS or other platforms, meticulously fill out all available fields. This includes the title, keywords (e.g., "open concept," "hardwood floors," "updated kitchen"), and especially alt-text, which improves accessibility and SEO.
- Incorporate Location-Specific Keywords: Weave the neighborhood, city, and local landmarks into your descriptions and metadata. This helps capture buyers searching for properties in a specific area, a key strategy detailed in guides on how to market rental properties on bounti.ai.
Top 10 Real Estate Photography Tips Comparison
Elevating Your Listings with Next-Generation Visuals
The journey from a standard property listing to a compelling digital experience is paved with high-quality visuals. Throughout this guide, we've navigated the essential real estate photography tips that form the bedrock of effective marketing. From the foundational principles of using a wide-angle lens and mastering lighting to the critical details of staging, decluttering, and optimizing camera settings, each technique plays a pivotal role in shaping a potential buyer's first impression.
Mastering these elements is no longer optional; it's the price of entry in a competitive market. When you consistently apply these best practices, you move beyond simply documenting a space. You begin to tell a story, evoke emotion, and build a powerful connection with prospective buyers before they ever step foot through the door. The goal is to make them feel at home, to help them envision their future within those walls, and that process starts with a flawless visual narrative.
From Fundamentals to Future-Forward Marketing
The true power of modern real estate marketing lies in integrating these proven photography fundamentals with the groundbreaking technological advancements now at your fingertips. Capturing stunning images is the first step, but leveraging them for maximum impact requires a forward-thinking strategy. This is where the concepts of virtual tours, 3D walkthroughs, and even AI-powered enhancements come into play, transforming a static gallery into an immersive, interactive exploration.
Think beyond the single, perfect shot. Consider how a series of images, a drone's-eye view, and a virtual tour work in concert to provide a comprehensive understanding of the property's flow, layout, and unique character. To fully grasp these advanced options for next-generation visuals, it's beneficial to understand what Extended Reality (XR) entails, as these technologies are increasingly blurring the lines between physical and digital property viewing experiences.
The Agent's Competitive Edge: Efficiency and Innovation
The ultimate takeaway is that your photography is more than just a marketing asset; it's a direct reflection of your brand, your professionalism, and your commitment to securing the best possible outcome for your clients. By embracing the full spectrum of real estate photography tips, from pre-shoot preparation to advanced post-processing and strategic distribution, you create a distinct competitive advantage.
This advantage is magnified when you incorporate tools that automate and elevate your workflow. The future of real estate marketing isn't just about taking better pictures; it's about working smarter. It involves leveraging artificial intelligence to handle tasks like virtual staging, item removal, or even generating compelling marketing copy from your visual assets. This frees you to focus on what you do best: building relationships, negotiating deals, and guiding your clients through one of the most significant transactions of their lives.
Your dedication to visual excellence will not go unnoticed. It will attract more qualified buyers, generate more inquiries, and ultimately lead to faster, more profitable sales. Continue to refine your skills, stay curious about emerging technologies, and remember that every shutter click is an opportunity to turn a listing into a buyer's dream home.
Ready to revolutionize your real estate marketing workflow? Discover how Bounti Labs uses AI to transform a simple property video into a complete marketing kit, including MLS-ready photos, virtual staging, property descriptions, and more. Stop spending hours on manual tasks and start creating stunning listings in minutes at Bounti Labs.